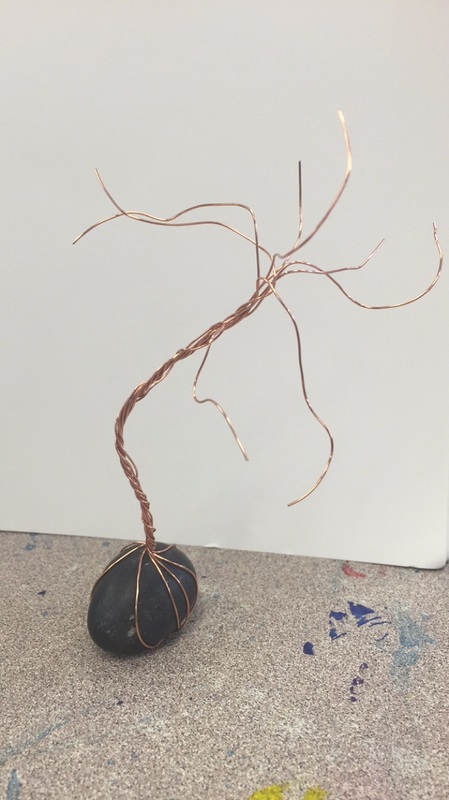
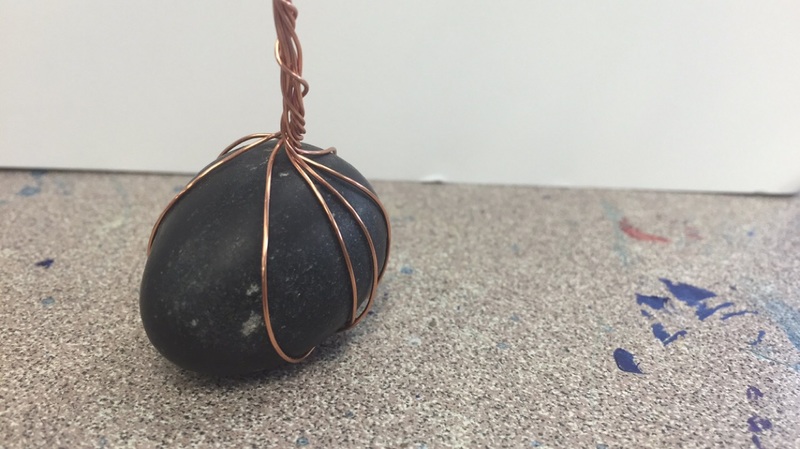
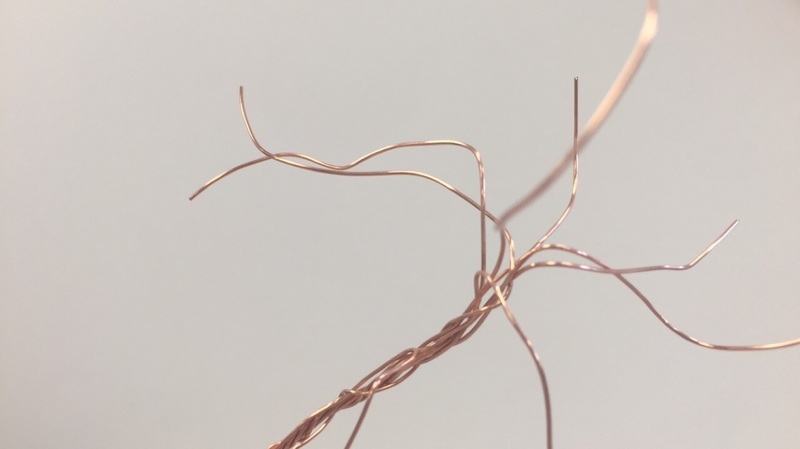
When I made my tree, I cut a fairly long length of wire, placed the rock in the middle, then wrapped both sides of the wire up around the rock. From there, I just twisted them until I was satisfied with the length of the "trunk". I did this several times to beef up the trunk a bit, then took the loose pieces at the top of the tree and bent them in different directions to give a canopy effect. I didn't want my tree to be super big, so I kept a more small and endearing style. Since the wires were slipping around the rock, I used some E6000 to tack them down. If I were to do this project again, I would try to find a bigger rock so it wouldn't be so hard to work with.
For this project, we started by rolling out a slab of clay to form around a styrofoam tray. Each person's tray was slightly different, so some people had circular ones instead of rectangular ones. After we were sure that the slab was wide enough to cover the tray, we smoothed the clay down around the tray. We let the clay dry just a little, then started painting on the black underglaze. We put on two to three coats of underglaze depending on how dark we wanted the black to be, and once all the coats dried, we used a needle tool to carve away the underglaze into our desired design. Once the designs were complete, we fired the pieces, dipped them in a clear glaze, then fired them again. I think the most successful part of my piece is the texture I achieved in the hair and the eyebrows. If I were to do it again, I would paint more coats of underglaze and would have spent a little more time making sure her face was proportionally correct and not crooked. I think I was introduced to the concept of taking away the highlights in a piece during this project, which was a technique I would later use with scratchboard.
I made the parachute portion by layering strips of plaster and fabric over a balloon. The paint treatment was something I sponged on because I wanted to have a very textural and interesting look. I based out the first coat of lavender with a brush. I liked the idea process because it was very democratic. I probably wouldn't have planned it out that much if I had been left to my own devices. I think the paint was really successful because it turned out exactly how I envisioned it. If I were to do it again, I would spend more time making the KSU sign more personal and interesting and I would have painted the inside of the parachute.
I'm sorry that I don't have good pictures of two of my bowls, but here goes nothing. For all three bowls, I used clay. Two of them were spun on the wheel and the last was a pinch pot because I ran out of time. The pinch pot is the one in the first picture, the other two were the wheel-spun ones. Honestly I think my pinch pot was my best one, so it's a shame that it disappeared! For some reason, both of my wheel-spun ones turned out really lopsided, and the one ended up chipping. I do still love them, though, because they have a lot of character. I enjoyed using the wheel because the clay looks really beautiful while you're throwing it, but it was also really stressful. I don't think my brain can function fast enough to keep up with it and I've never been good with small movements. I would love to get better with it, though!!!
For this project, I was assigned a box full of random objects. Most of these objects were wire and other metal pieces, so I took some curly wire pieces and the large screws with me to use for my project. Honestly, the materials themselves didn't present much of an obstacle, as they were a complimentary feature of the work as opposed to a major component. I suppose I overcame the obstacle of using such small objects by finding a way to tie them into other things and by also trying to thing of what they reminded me of. I think the most successful thing about this piece is just the aesthetic of it in general; it came across exactly how I wanted it to! If I could have done it again, I would have just worked to refine the rough edges on the plywood and the plaster. The only thing I would add to this piece if I did it again would be some sort of varnish to make the face of the guitar look more glossy and professional. like a real electric guitar.
Here's the link for the first project's inspiration: https://www.pinterest.com/Erliiveera/vessel-project/
The only real plan I had for the basket piece was just thinking through the execution. Since I have finger knitted before, I knew that the scarf-like formation I would produce would curl on its own. I decided the easiest way to pull the basket shape off would be to use this curl to build the piece almost like you would for a coil piece of pottery. I just tied the coils together so they would stretch and hold their form when full. The second piece was just for fun, so I had literally no planning process for it. The basket piece fits the vessel theme because it can expand to hold just about whatever you like! Here it's shown holding other skeins of yarn, but when I take it home I will probably just stuff it full of random doo-dads. The second piece is a tealight candle holder (it actually works, I tried it at home!). I think both pieces were really successful. If I were to do the basket again, If I were to do the candle holder again, I would have brought in a candle to measure the indentation with to make sure it fit properly (it ended up being a tad too small). My main inspiration for the basket piece was just that I saw a lot of people using clay and I wanted to challenge myself to make a piece out of a more unconventional material. For the second piece, I really was inspired by the piece itself. I would add something and really love it, then continue adding features I thought would enhance the final product. Well, I didn't really have a step by step process for making this piece. The entire thing was improv, right down to the actual sculpt itself. I just grabbed a lump of clay and went for it. I did make sure I kept all of the edges smooth and flowing. I didn't have a method for the burn materials either, I just threw stuff on there that was close and weird just to see what happened. I only knew I wanted to put salt on the piece because I thought it would burn pink or blue. I think this technique is so different from normal firings because of the actual interaction you have with the pieces as they are firing. Usually you would just pile all the stuff in a kiln and turn it on, but for pit fires you actually have to generate the heat yourself. I think this helps you appreciate the pottery that much more because the volatility of the situation is much more apparent. I liked this project a lot in the end because it was fairly simple, but was always a surprise. I would definitely do pit fire pieces in the future because I like the experience of getting to sit around the fire as the piece burned down and I also liked trying my luck with flammable materials.
My favorite part of this project was how soothing the repetitive motions were. Since I used the same technique over and over again, I was able to get through the project quickly and with minimal complications. I think the hardest part about the piece was that once I got one tube misaligned, all of the rest had the same subtle lean to them. This piece definitely taught me the art of patience and allowing the piece to form without thinking about it too much.
Pit firing is a technique for firing pottery where the pieces are wrapped in flammable objects and literally put in a pit to fire. The flammable objects burn off in different colors, which gives the pottery a very unique appearance. Foil saggar is when you wrap your piece in foil to contain the gases and smoke that result from the chemical reactions. Though I don't have any planning process for my pit fire peace (I just sorta messed with the clay and stuff happened), I do have a picture of my piece in progress after coming out of the bisque kiln.
|
AuthorWrite something about yourself. No need to be fancy, just an overview. Archives
June 2016
Categories |